Track User Behaviour On Your Website With Google Analytics & Next.JS
How To Set Up Google Analytics With Next.JS Script Component

A software engineer turned developer relations engineer in the web3 space, from Australia 🇦🇺.
Introduction
In this blog post, we'll go through how to set up Next.JS with Google Analytics using the latest versions (Next.JS 11 and Google Analytics 4).
As part of Next.JS 11, the new Script Component was added, to automatically prioritize loading of third-party scripts to improve performance.
Google Analytics is a great, free way to track the performance of your web and mobile applications. If you'd like to learn more about the new features in Next.JS 11, check out my previous blog post here:
For Video Lovers 😍
TLDR:
If you've already got your site and your Google Analytics account set-up, simply add the below code snippet in your _app.js file, and replace the G-XXXXXXXXXX with your Google Analytics measurement ID.
If you haven't got everything prepared yet, let's continue on to the first step of setting up Google Analytics with Next JS, below this snippet.
_app.js:
import Script from "next/script";

// ...

// This code belongs ABOVE the <Head> tag in your _app.js file's return.

{/* Global Site Tag (gtag.js) - Google Analytics */}
<Script
  strategy="lazyOnload"
  src={`https://www.googletagmanager.com/gtag/js?id=G-XXXXXXXXXX`}
/>

<Script strategy="lazyOnload">
  {`
      window.dataLayer = window.dataLayer || [];
      function gtag(){dataLayer.push(arguments);}
      gtag('js', new Date());
      gtag('config', 'XXXXXXXXXX', {
        page_path: window.location.pathname,
      });
  `}
</Script>
Step 1: Creating a Google Analytics Property
The absolute first thing we'll need to do for those starting from scratch is to create a Google Analytics Property.
To do that, you'll first need to go to Google Analytics and sign in with your Google Account.
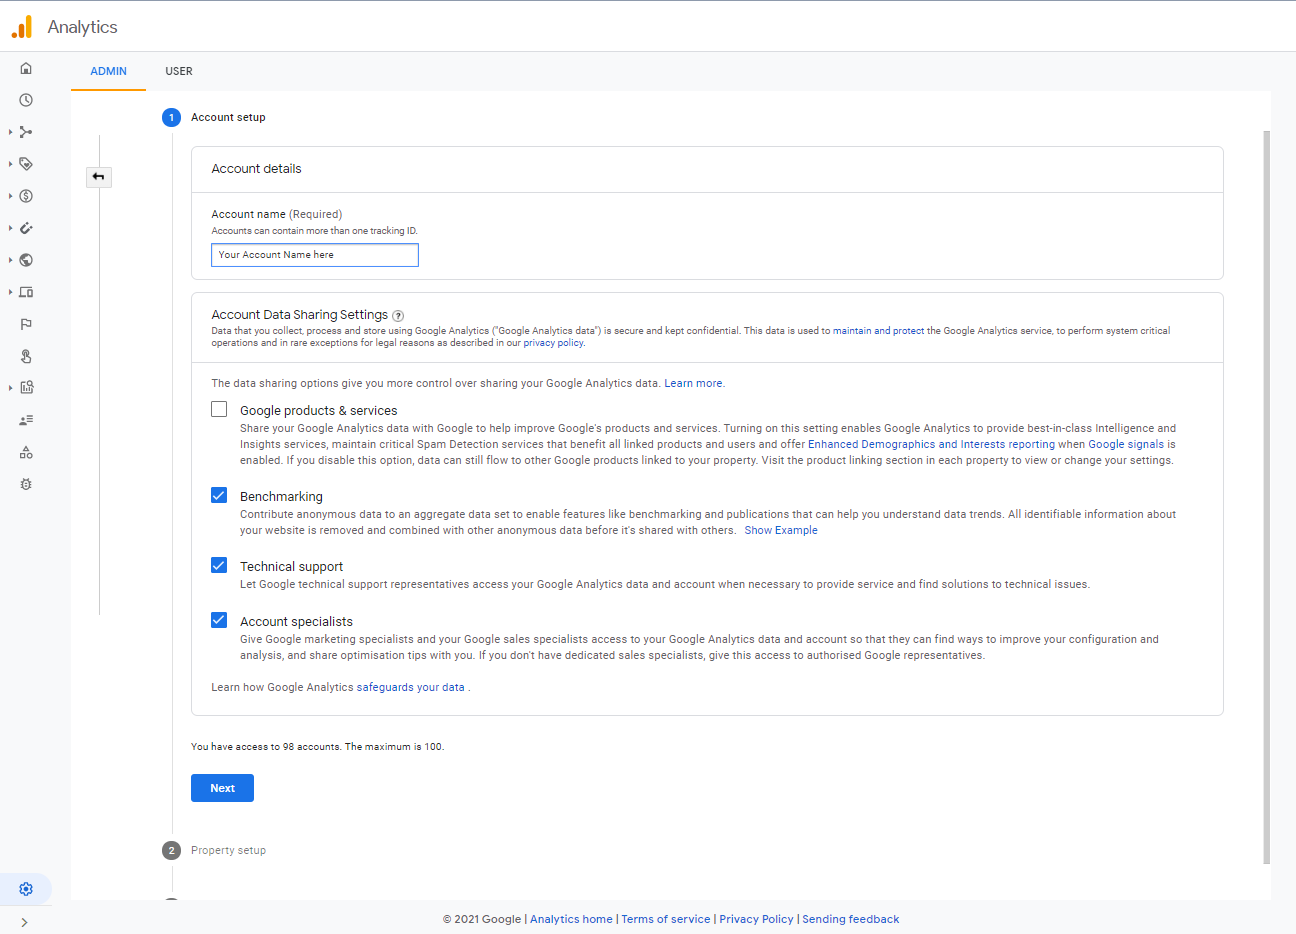
Before creating a Property, you'll need to create an account within Google Analytics.
The next step will allow you to create a property within your newly created Google Analytics account:
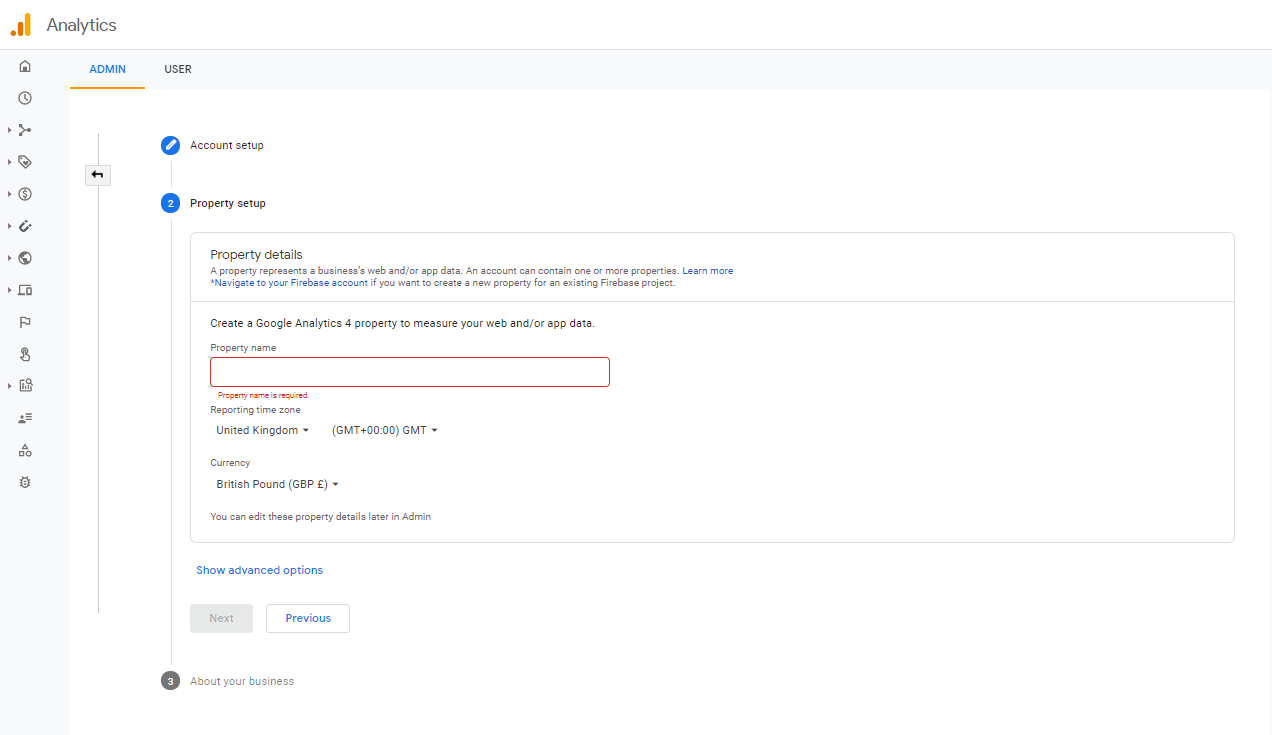
Set up your Google Analytics 4 property with the settings to your liking, and meet us at the next step!
Step 2: Creating a Data Stream in Google Analytics
Once you have successfully created your Google Analytics property, we'll need to create a Data Stream to start collecting data from our website.
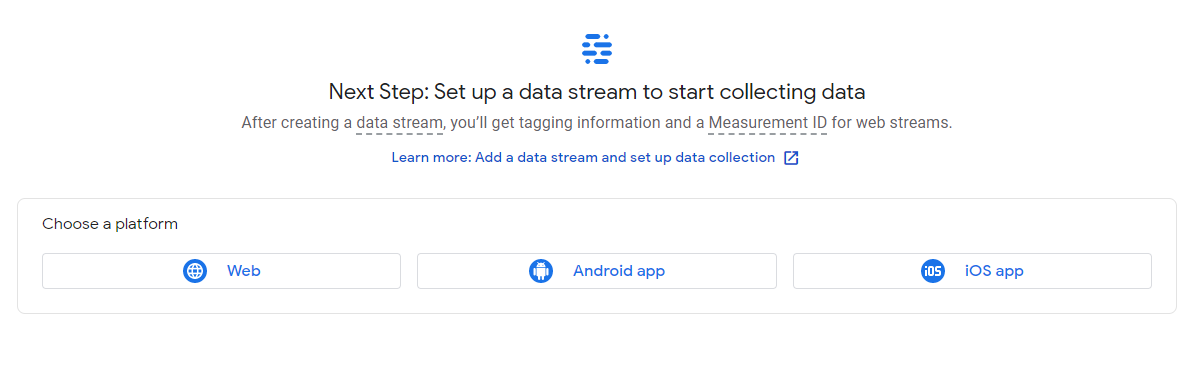
Since we're using Next.JS, I'll create a Web Data Stream.
Enter a Name and the url of your website, and click Create Stream:
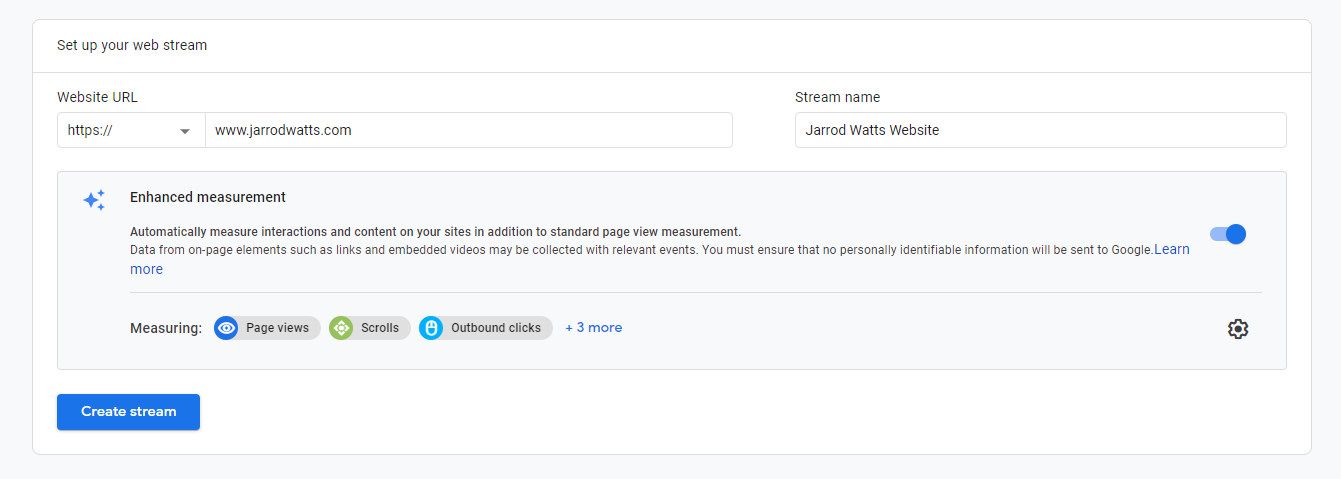
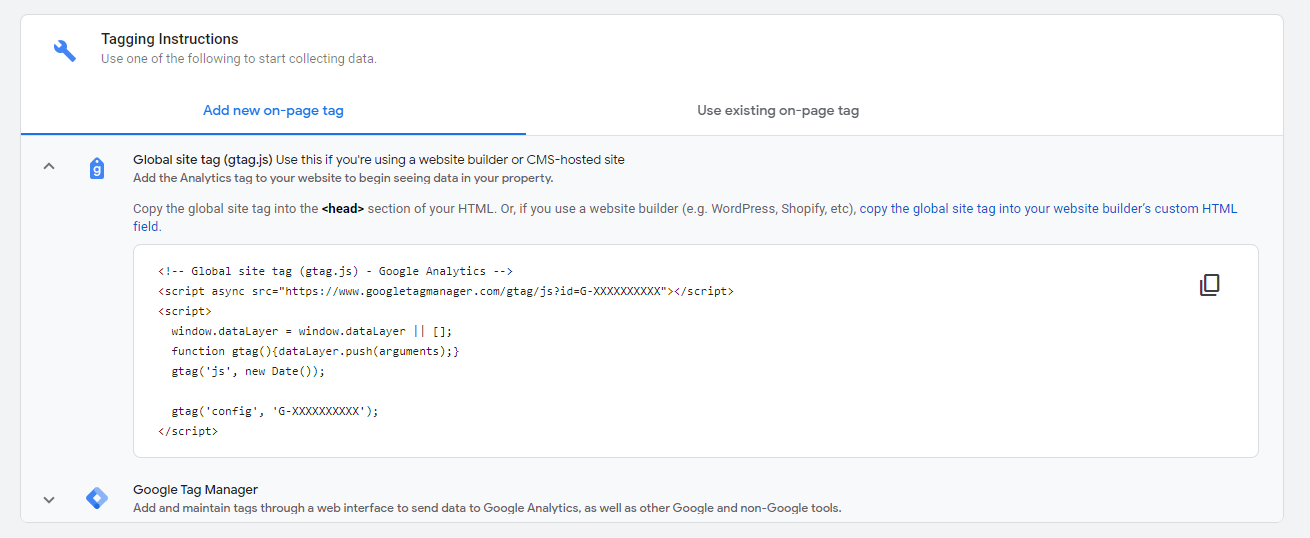
Once you've created the stream, you'll hopefully be shown the tag to put into your application, copy this code somewhere because we'll be coming back to it later.
Step 3: Setting Up The Next.JS Project.
If you already have an existing Next.JS Project you'll need to upgrade to Next.JS version 11 to use the Script component, to do that, run:
npm install react@latest react-dom@latest

npm install next@latest
For those starting with a new Next.JS project, we'll create a new project by running:
npx create-next-app my-app-name
Step 4: Placing the Script Components
Open up your newly created project in the text editor of your choice.
_app.js
Next.js uses the App component to initialize pages. You can override it and control the page initialization.
_app.js Allows you to write code that will impact ALL of your pages - so it is the perfect place for us to create the Script components.
Our default _app.js file looks like this:
import '../styles/globals.css'

function MyApp({ Component, pageProps }) {
  return <Component {...pageProps} />
}

export default MyApp
Let's modify it to place our Google Analytics tracking tags on every page.
Firstly we will need to import the Script component from Next.
import Script from 'next/script'
Then, modify our return code to look like this:
Replacing XXXXXXXXXX with your real Measurement ID.
return (
    <>
      <Script
        strategy="lazyOnload"
        src={`https://www.googletagmanager.com/gtag/js?id=XXXXXXXXXX`}
      />

      <Script strategy="lazyOnload">
        {`
          window.dataLayer = window.dataLayer || [];
          function gtag(){dataLayer.push(arguments);}
          gtag('js', new Date());

          gtag('config', 'G-XXXXXXXXXX');
        `}
      </Script>

      <Component {...pageProps} />
    </>
  );
Awesome! Now let's test out our code to make sure it's working correctly.
Step 5: Testing The Tags
To run your application on a web environment, run :
npm run dev
from the root of your project's directory.
This will bring up your web application at localhost:3000.
There are a number of checks we can make to ensure we have set up Google Analytics correctly.
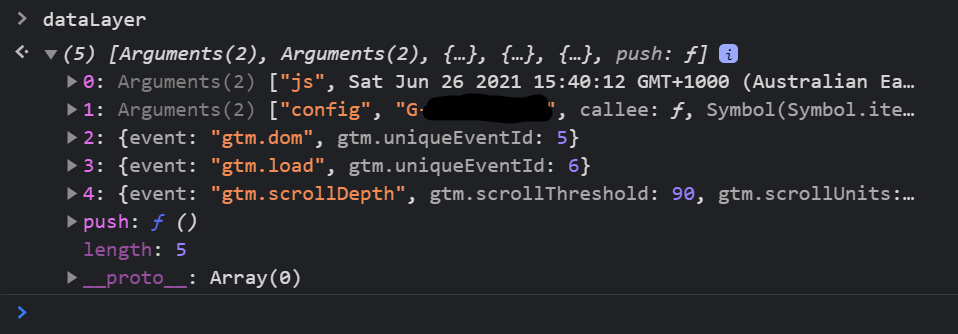
The first one being opening up the Chrome Console by hitting the F12 key.
Type dataLayer into the console to see the events that have been sent by the analytics tag, like this:
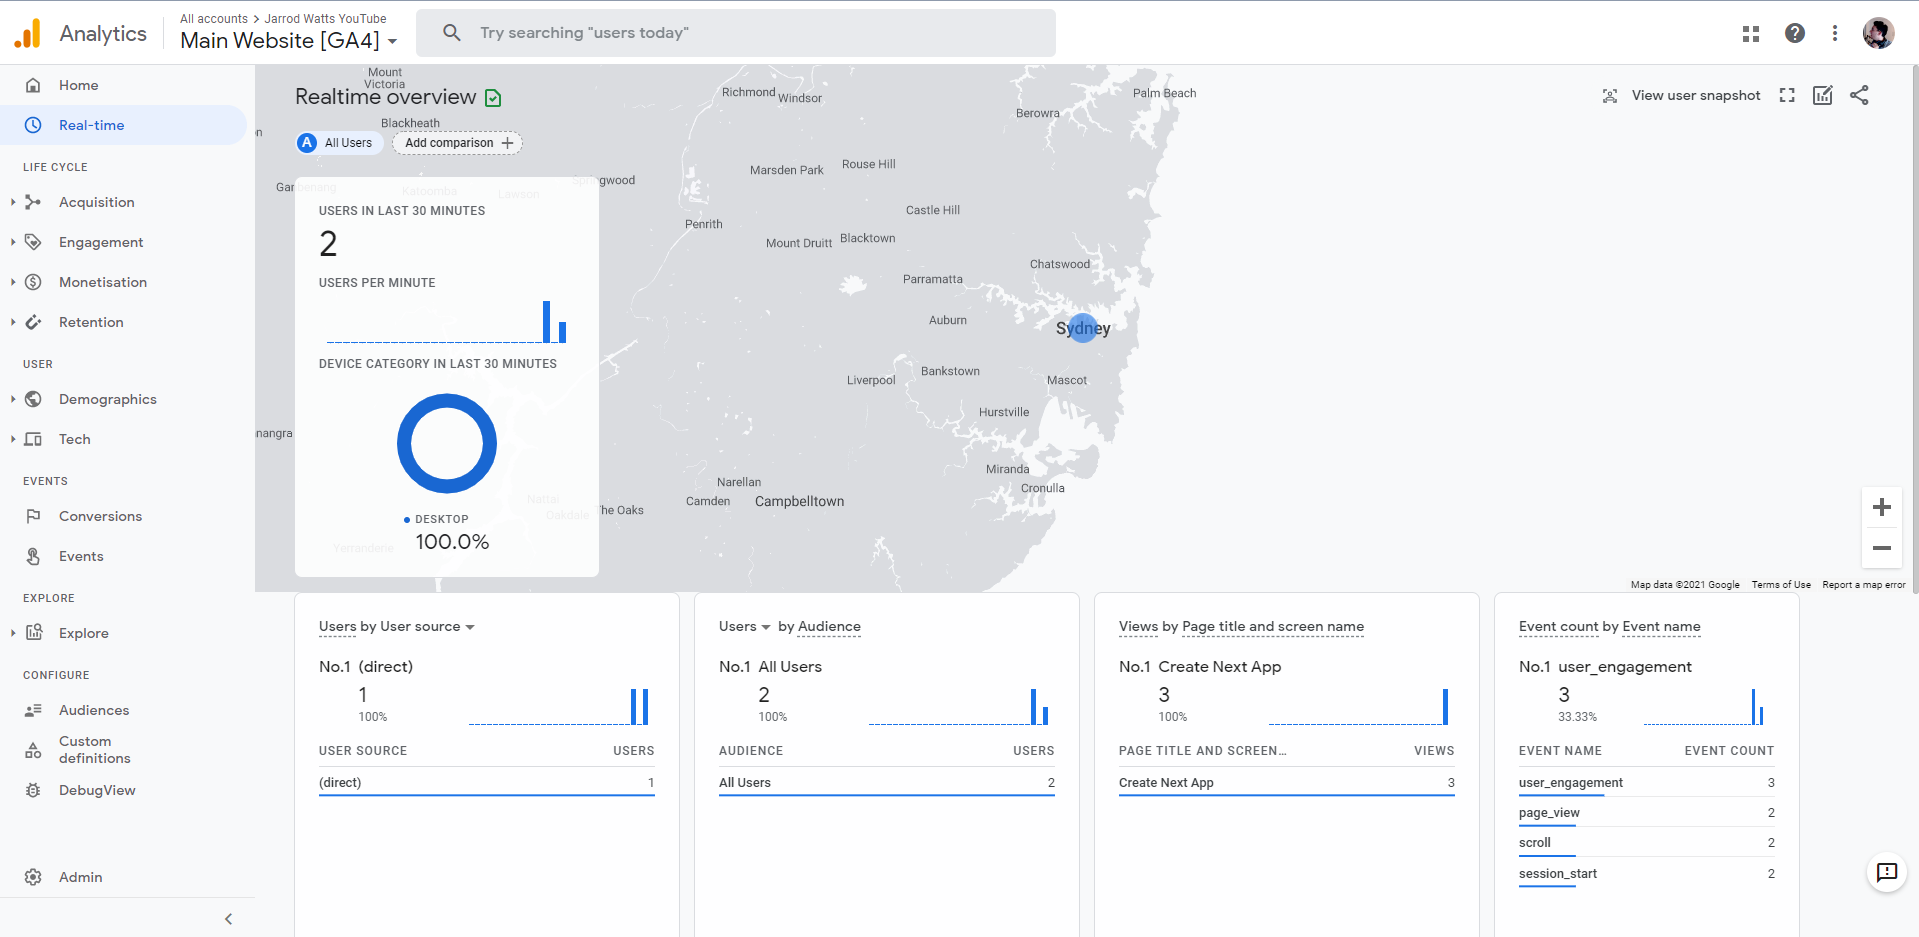
Next, we can check our Real-time Overview in our Google Analytics Property. Here, you should see events coming through with information about which pages user's are visiting on your site.
Bonus: Environment Variables
To keep your Google Analytics measurement ID hidden from the public, you can utilize environment variables.
To use environment variables, create a .env.local file at the root of your project.
Create an entry into that file like this:
NEXT_PUBLIC_GOOGLE_ANALYTICS=G-XXXXXXXXXX
Then rather than hard-coding your measurement ID into the script, change it to reference that environment variable, like so:
return (
    <>
      <Script
        strategy="lazyOnload"
        src={`https://www.googletagmanager.com/gtag/js?id=${process.env.NEXT_PUBLIC_GOOGLE_ANALYTICS}`}
      />
      <Script strategy="lazyOnload">
        {`
          window.dataLayer = window.dataLayer || [];
          function gtag(){dataLayer.push(arguments);}
          gtag('js', new Date());

          gtag('config', ${process.env.NEXT_PUBLIC_GOOGLE_ANALYTICS});
        `}
      </Script>
      <Component {...pageProps} />
    </>
  );
Conclusion
The new Script Component and the utilization of the lazyOnload strategy, is a great way to set-up Google Analytics without hurting the performance of your website, in Next.JS 11.
With next/script, you no longer need to use the _document.js or dangerouslySetInnerHTML, and also no longer need to include your scripts as part of the <Head> tag.
Next.JS's recent addition of the Script component is an amazingly simple way to implement Google Analytics across all of the pages in your Next.JS application.
Connect With me!
YouTube: youtube.com/channel/UCJae_agpt9S3qwWNED0KHcQ
Twitter: twitter.com/JarrodWattsDev
GitHub: github.com/jarrodwatts
LinkedIn: linkedin.com/in/jarrodwatts
Website: jarrodwatts.com