Create A Blockchain Indexer with Chain Indexer Framework
A software engineer turned developer relations engineer in the web3 space, from Australia 🇦🇺.
This guide will show you how to build your own indexer for an EVM-compatible blockchain such as Ethereum, Polygon Proof of Stake, and more!
By the end, you'll have a Docker container running Kafka that captures all blockchain events that you specify, along with references for how to transform and consume this data inside applications!
Let's do this!
How It Works
The architecture of the Chain Indexer Framework can be broken up into three parts:
Block Producers: Scan the blockchain and publish raw block data into Kafka.
Transformers: Shape the raw data from Kafka into meaningful events.
Consumers: Read the transformed data for various use cases such as from a frontend application or an API endpoint.
We're going to first set up our Kafka instance inside a Docker container, then run one script written in TypeScript for each of the three components.
Architecture Diagram
The producer reads data from the specified blockchain and publishes it into our Kafka instance running in a Docker container. At the same time, it also keeps the most recent blocks inside Mongo DB in case of reorgs.
Once it's stored in Kafka, we're able to transform it into more meaningful data, and also make it available for any consumer(s) to read; such as applications.

Setting Up the Backend Infrastructure
Before we create each of the three services (producer, transformer, consumer), we need to set up the infrastructure required to connect to the blockchain and store data. In this section, we'll set up the following services:
An RPC to connect to the blockchain
A Docker container running Kafka to store raw data
A Mongo database for storing the most recent blocks.
Let's first create a new directory to contain all of the work we're about to do:
# Create our base directory
mkdir chain-indexer-framework-guide

# Change into this new directory
cd chain-indexer-framework-guide

# Open in VS Code
code .
Creating the Docker Compose File
Now we're here, let's set up our Docker container by creating a Docker Compose file.
The Docker Compose file allows us to define our app's environment. To create one, let's create a docker-compose.yml file within this current directory.
Within docker-compose.yml, set up the following compose file:
---
version: "3"
services:
  zookeeper:
    image: confluentinc/cp-zookeeper:7.0.0
    hostname: zookeeper
    container_name: zookeeper
    environment:
      ZOOKEEPER_CLIENT_PORT: 2181
      ZOOKEEPER_TICK_TIME: 2000

  broker:
    image: confluentinc/cp-kafka:7.0.0
    container_name: broker
    ports:
      - "9092:9092"
    depends_on:
      - zookeeper
    environment:
      KAFKA_BROKER_ID: 1
      KAFKA_ZOOKEEPER_CONNECT: "zookeeper:2181"
      KAFKA_LISTENER_SECURITY_PROTOCOL_MAP: PLAINTEXT:PLAINTEXT,PLAINTEXT_INTERNAL:PLAINTEXT
      KAFKA_ADVERTISED_LISTENERS: PLAINTEXT://localhost:9092,PLAINTEXT_INTERNAL://broker:29092
      KAFKA_OFFSETS_TOPIC_REPLICATION_FACTOR: 1
      KAFKA_TRANSACTION_STATE_LOG_MIN_ISR: 1
      KAFKA_TRANSACTION_STATE_LOG_REPLICATION_FACTOR: 1
We won't cover all of the fields in this guide (learn more about compose files), but this file will allow us to run a Docker container with Apache ZooKeeper for maintaining configuration information and Apache Kafka to store our raw data.
Running the Docker Container
Now we've defined our compose file, let's run the Docker container.
Use Docker Compose's "up" command with the -d flag to run the container in detached mode.
docker-compose up -d
Run the docker ps command to view the status of all containers:

You can also run Docker Desktop to see the container running:

Now our Kafka instance is up and running, we're ready to store raw data from the blockchain. However, to read blockchain data, we'll need a way of connecting to the chain itself; so let's create a new RPC node next.
Creating the RPC Node
There are many solution providers that provide RPC connections to blockchains. In this guide, we'll use a popular RPC provider, Alchemy as our RPC provider as they provide a generous free tier.
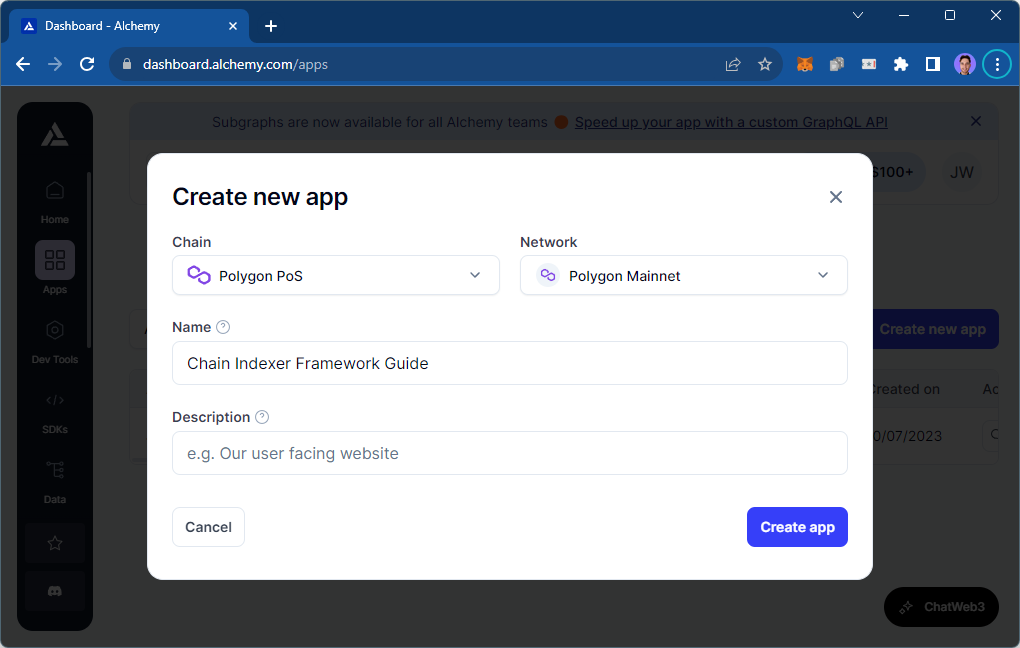
To get started, head to the Apps page of your Alchemy Dashboard and click Create New App:
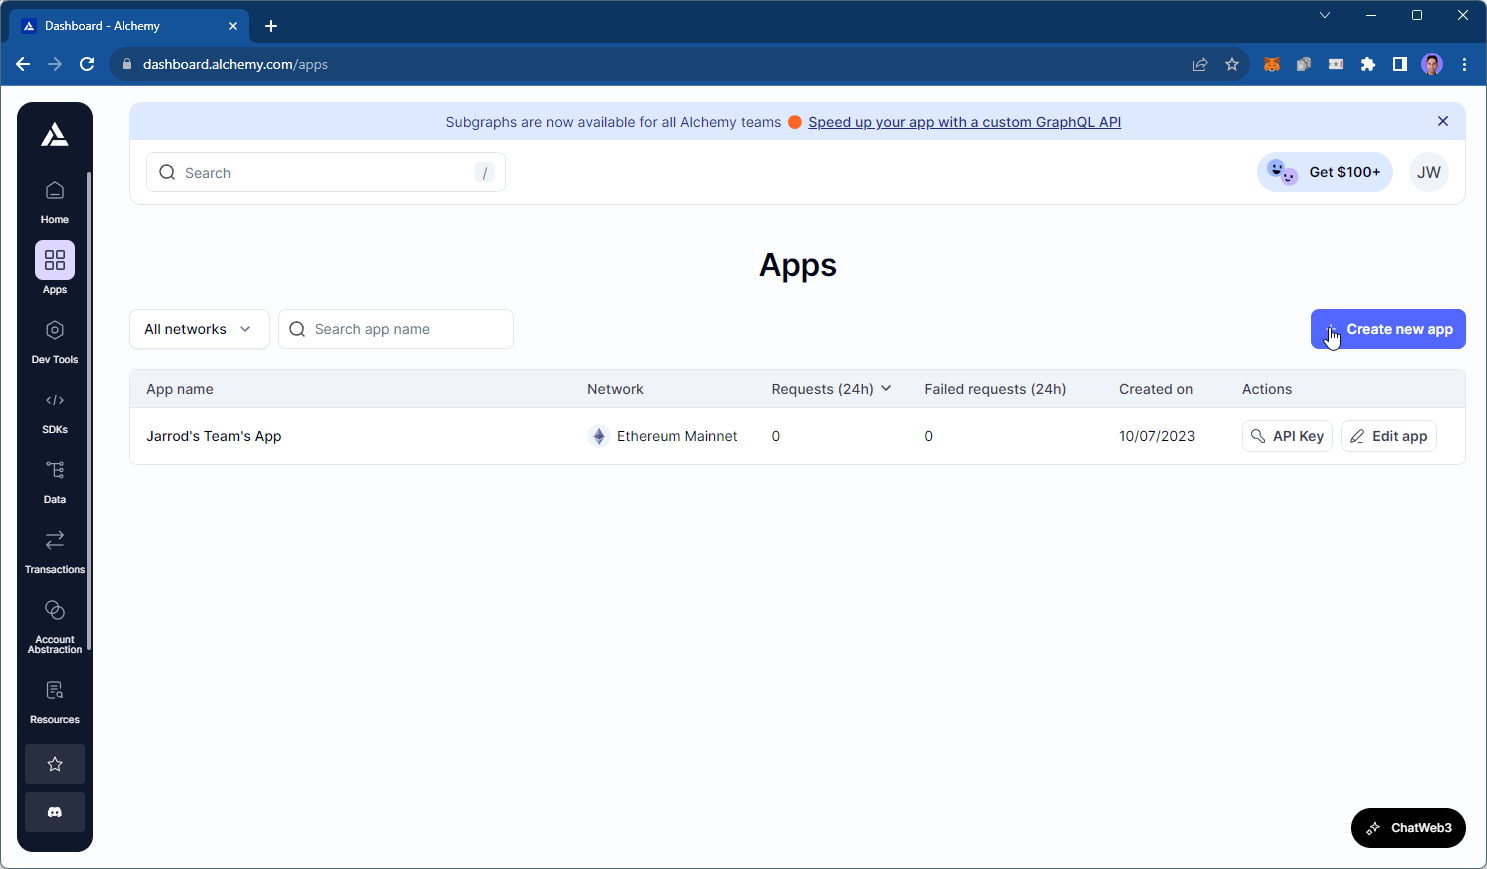
Select the chain and network you want to read data from and click Create app:
We'll come back to this later to grab our RPC URL when we write the producer.
Creating A Mongo DB
Next, let's set up a database to do TODO.
In this guide, we'll use Mongo DB, as the Chain Indexer Framework's Producer has a mongoUrl property we can easily plug this database into.
Sign up to Mongo DB if you haven't already, and deploy a new database.
Below are the options that I chose; but you can customize this to your preferences:

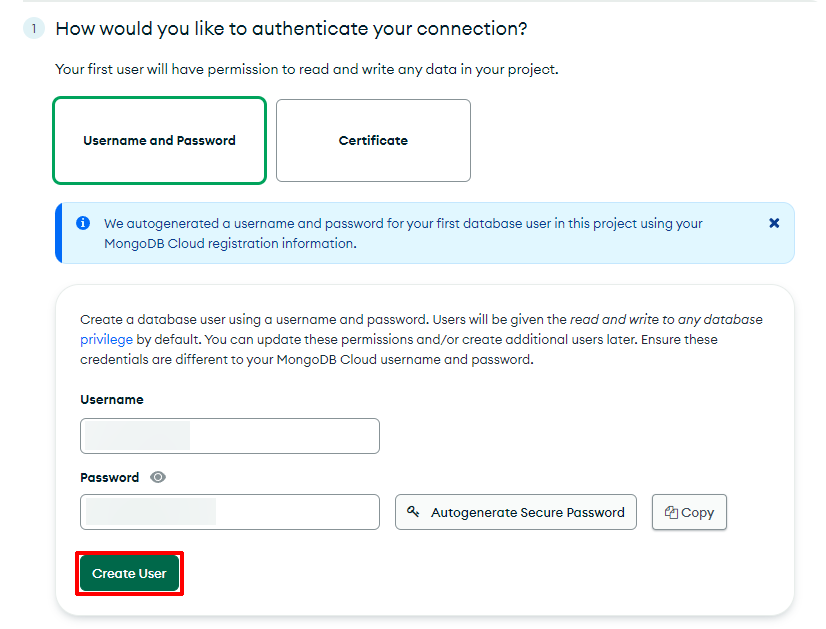
Once your database is provisioned, complete the setup process.
First, add an authentication method; in this guide, we're using a simple username and password that is auto-generated for us.
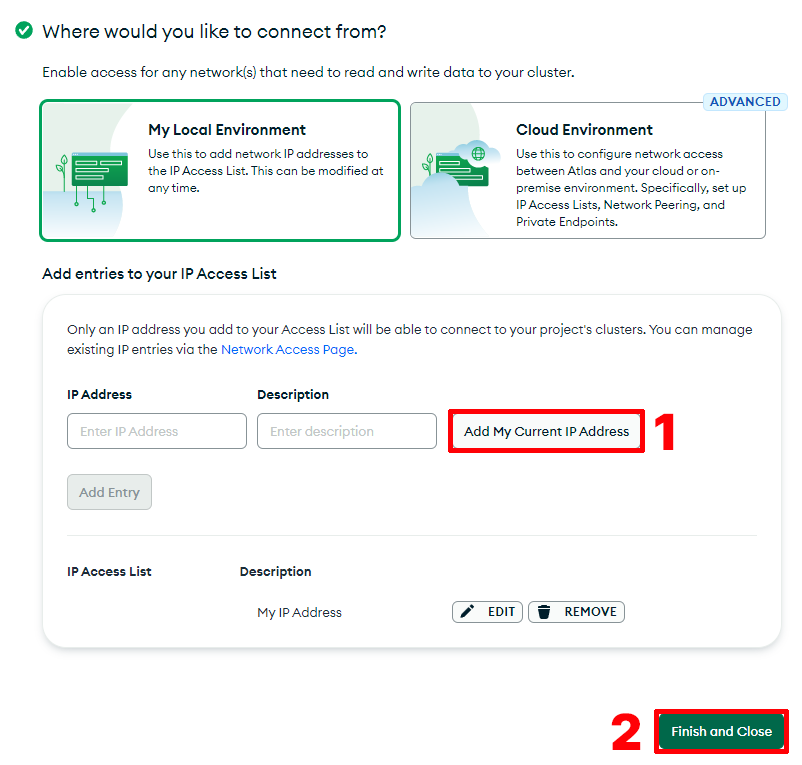
Second, configure who can access your database. In this guide, we're simply adding our current machine's IP address. Finally, click Finish and Close.
Finally, the infrastructure setup is complete! 🎉
Setting up Node.js + TypeScript
Now we're ready to set up the three components of the Chain Indexer Framework.
Set up a simple TypeScript + Node.js project by running the following command:
npm init -y
To add TypeScript, create a tsconfig.json file with the following contents:
{
  "compilerOptions": {
    "module": "NodeNext",
    "moduleResolution": "NodeNext",
    "esModuleInterop": true,
    "target": "ES2020",
    "sourceMap": true,
    "strict": true,
    "outDir": "dist",
    "declaration": true
  },
  "include": ["src/**/*"]
}
Set the package.json file to the following:
{
  "name": "producer",
  "version": "1.0.0",
  "type": "module",
  "main": "index.js",
  "scripts": {
    "build": "tsc",
    "start-producer": "npm run build && node --experimental-import-meta-resolve --trace-warnings dist/producer.js",
    "start-transformer": "npm run build && node --experimental-import-meta-resolve --trace-warnings dist/transformer.js",
    "start-consumer": "npm run build && node --experimental-import-meta-resolve --trace-warnings dist/consumer.js"
  },
}
Install the required TypeScript dependencies:
npm install -D typescript @types/node
Before installing further dependencies, you'll need to follow the installation instructions of node-gyp as a pre-requisite to installing the @maticnetwork/chain-indexer-framework package. If you're on Windows, this includes installing a current version of Python and the Visual C++ Build Environment in Visual Studio.
Next, install the @maticnetwork/chain-indexer-framework package by running the following:
npm install @maticnetwork/chain-indexer-framework
Finally, create a src folder, containing three files:
producer.tstransformer.tsconsumer.ts
Now we're ready to go. Let's start with the producer.
Creating the Producer
Inside the producer.ts file, we're going to connect to the blockchain you selected in the RPC step and write raw data to Kafka.
Below is the barebones code to start storing raw data in Kafka. Mongo DB is used to store the most recent number of blocks (specified in the maxReOrgDepth field) before they become permanent inside Kafka.
import { BlockPollerProducer } from "@maticnetwork/chain-indexer-framework/block_producers/block_polling_producer";
import { produce } from "@maticnetwork/chain-indexer-framework/kafka/producer/produce";

const producer = produce<BlockPollerProducer>({
  startBlock: 50689834, // Pick any start block you want
  rpcWsEndpoints: ["<your-alchemy-rpc-url-here>",],
  blockPollingTimeout: 20000,
  topic: "polygon.1442.blocks",
  maxReOrgDepth: 256, // Maximum reorg depth on Polygon is 256
  maxRetries: 5,
  mongoUrl: "mongodb+srv://<your-mongo-username>:<your-mongo-password>@chain-indexer.0ymaemb.mongodb.net/",
  "bootstrap.servers": "localhost:9092",
  "security.protocol": "plaintext",
  type: "blocks:polling",
});

producer.on("blockProducer.fatalError", (error: any) => {
  process.exit(1); //Exiting process on fatal error. Process manager needs to restart the process.
});
Importantly, you need to:
Add your HTTPS Alchemy RPC URL in the
rpcsWsEndpointsfield.Add your Mongo URL connection string as the
mongoUrl.Optionally, configure the other properties to your preferences.
When you're ready, you can run the following command to start the producer:
npm run start-producer
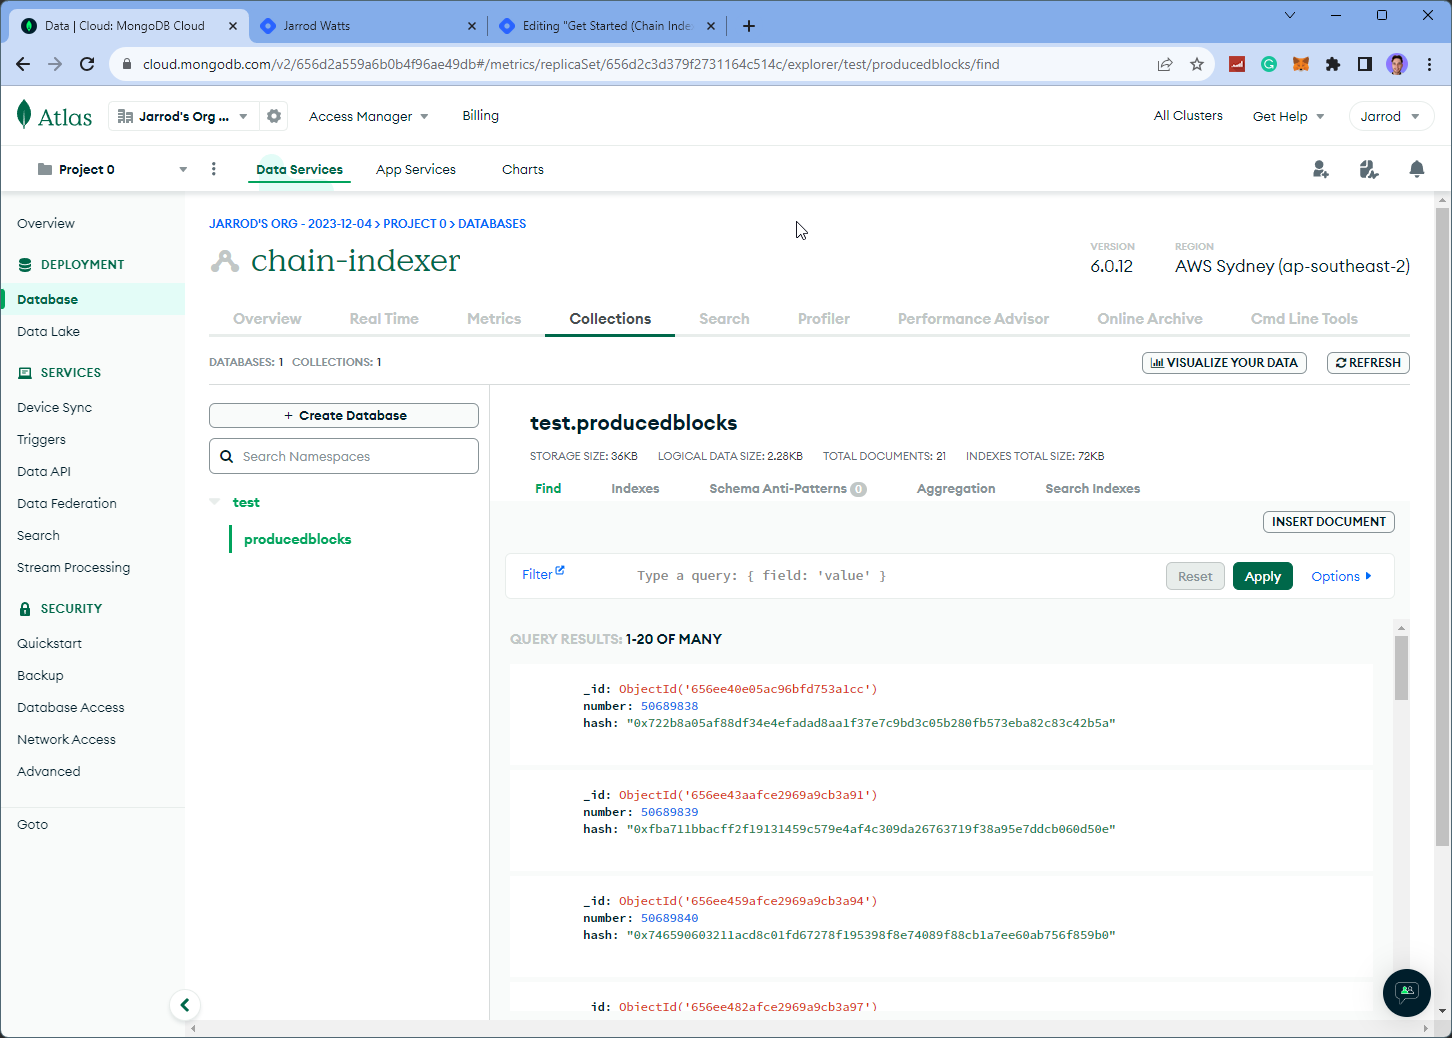
If everything's working as expected, you should begin to see some data appear in Mongo DB, which you can find in the Database > Collections section:
Adding Logging
The Chain Indexer Framework also comes with logging capabilities to see what's happening behind the scenes. To add it to your producer, first import the Logger:
import { Logger } from "@maticnetwork/chain-indexer-framework/logger";
And optionally add logs to any events emitted by the producer, for example:
producer.on("blockProducer.fatalError", (error: any) => {
  Logger.error(`Block producer exited. ${error.message}`);
  process.exit(1); //Exiting process on fatal error. Process manager needs to restart the process.
});
Transforming & Consuming Data
Now we have raw data available inside our Kafka instance! You're ready to begin transforming and consuming data in your applications.
Although there's a decent chunk of code to get started with these steps, we've already layed the foundation for everything, so it should be relatively simple!
Rather than dumping all the code for you to copy & paste, we've made a few open-source examples of how to setup different kinds of transformers and producers on GitHub linked below.