How To Set Up Next.JS With Jest, React Testing Library and Playwright

A software engineer turned developer relations engineer in the web3 space, from Australia 🇦🇺.
Introduction
In this blog post, we'll explore how to set up a Next.JS project with bulletproof testing libraries, including:
- Unit Testing with Jest and React Testing Library
- Integration Testing and End to End (E2E) Testing with Playwright
As a bonus, we'll explore how to set all of these tests up in a CI/CD (Continuous Integration / Continuous Development) Pipeline using GitHub Actions.

Why would we bother with all this?
Testing is a fundamental and underrated part of developing resilient web applications. When you want to ship to production, you want the assurance that your code changes haven't impacted or broken any other parts of your code and that everything is still working as expected.
Utilizing tests, and additionally working in a Test-Driven-Development (TDD) style can maximize the confidence that you have in your code, and if you want to sleep well at night, knowing your tests have got you covered, let's get started on how to set up the tools to do so!
Just Want To See The Code?
No worries! I've got all the code up on my GitHub. Please consider starring the repo!
What Are These Tools?
It's important before using any tool to know what you're getting yourself into, let's start with a quick overview of what each of these tools are designed for.
Jest
Jest is a JavaScript Testing Framework.
Read that again! It's simply designed for JavaScript, not necessarily React!
You could use Jest to test a simple function that returned Hello World from a pure JavaScript function. Or you could use a library like we are going to with React, and test the functions that you write for the results you expect.
The key difference here is that Jest is agnostic across all JavaScript frameworks, it doesn't care if you're using Angular (but I am judging you for it), Vue, React, or just plain JavaScript.
At its core, you can just think of Jest as a pure JavaScript function runner, which:
- Takes in a function
- Runs it in an isolated environment with configuration of your choosing
- Compares the behaviour of that function with what you expect it to be.
React Testing Library
React Testing Library allows you to write code to test your React Components, and the DOM nodes within them.
This is different from Jest as it is specifically designed to run with React, and utilises the DOM Testing Library under the hood to represent React components as accurately as possible when compared to the real thing.
Okay, so why do we need both? Great question! Well, the way I like to see it is that there are two main reasons.
Jest enables us to easily run our React Testing Library tests, using the Jest Test Runner. This means we can write
___.test.jsfiles and easily run them with thejestcommand on the command line.React Testing Library enables us to query and check the DOM nodes (AKA the elements of your rendered application) and then use Jest's assertions to make checks on those nodes.
Hopefully, you're clear on why each tool exists, and why we want to use both the tools to run tests for our Next.JS applications.
Playwright
Playwright is an End To End (E2E) testing library and test runner.
You can imagine E2E tests as a robot opening up your website, and interacting with it as if it were a user. At each step of the way, you can make assertions to how your site should look and behave.
E2E testing is awesome because it can provide confidence that your critical flows are working, such as:
- Making sure users can sign up
- Making sure users can pay for stuff
There are a number of E2E testing libraries out there, so why are we using Playwright?
Playwright allows you to automate Chromium, Firefox, and WebKit with a single API. Meaning we can test all web platforms for our expected behaviour with a single codebase.
This allows us to catch those sneaky bugs on the browsers most developers wouldn't typically use... I'm looking at you Safari!
me looking at my website on Safari:

Setting Up Our Project
Now that we know all the details of the tools, let's get started setting up our Next.JS project.
Create a Next.JS Project
To create a new Next.JS project with TypeScript support, run the following command from your command line:
npx create-next-app@latest --ts
Give your project a name, and then open up the project in the code editor of your choice!
Installing Jest and React Testing Library
To install Jest and React Testing Library, as well as some other packages (to support them) into our project, let's run the following command:
npm install --save-dev jest babel-jest @testing-library/react @testing-library/jest-dom identity-obj-proxy react-test-renderer
Now let's set up Jest to play nicely with Next.JS, by creating a jest.config.js file at the root of your project's directory.
Add the following configuration options to the jest.config.js file.
// jest.config.js

module.exports = {
  collectCoverageFrom: [
    '**/*.{js,jsx,ts,tsx}',
    '!**/*.d.ts',
    '!**/node_modules/**',
  ],
  moduleNameMapper: {
    /* Handle CSS imports (with CSS modules)
    https://jestjs.io/docs/webpack#mocking-css-modules */
    '^.+\\.module\\.(css|sass|scss)$': 'identity-obj-proxy',

    // Handle CSS imports (without CSS modules)
    '^.+\\.(css|sass|scss)$': '<rootDir>/__mocks__/styleMock.js',

    /* Handle image imports
    https://jestjs.io/docs/webpack#handling-static-assets */
    '^.+\\.(jpg|jpeg|png|gif|webp|avif|svg)$':
      '<rootDir>/__mocks__/fileMock.js',
  },
  testPathIgnorePatterns: ['<rootDir>/node_modules/', '<rootDir>/.next/'],
  testEnvironment: 'jsdom',
  transform: {
    /* Use babel-jest to transpile tests with the next/babel preset
    https://jestjs.io/docs/configuration#transform-objectstring-pathtotransformer--pathtotransformer-object */
    '^.+\\.(js|jsx|ts|tsx)$': ['babel-jest', { presets: ['next/babel'] }],
  },
  transformIgnorePatterns: [
    '/node_modules/',
    '^.+\\.module\\.(css|sass|scss)$',
  ],
}
What did we just do?! Let's break it down:
collectCoverageFrom: Tells Jest that we want to collect via a glob pattern (basically just saying we want to look at.js, .jsx, .ts, .tsxfiles.moduleNameMapper: We're using this to "stub out" importing CSS and images, since they are a little special with Next.JS - we'll add some files to expand on this mocking behaviour shortly.testPathIgnorePatterns: Ignore any files that match this pattern.testEnvironment: Set's the jest environment tojsdomwhich is a browser-like environment.transform: Transform source files throughbabelbefore running the tests.transformIgnorePatterns: Ignore transforming files that match this pattern.
Handling CSS and Images
As mentioned above, we added moduleNameMapper configuration into our Jest config.
The reason we stub/mock CSS and images is because they aren't really important when we are running unit tests. But our code will still often import them and we need to mock their implementation to make our tests happy.
To mock images and styles, we can simply create two files to provide a dummy value whenever we encounter them.
To do that, create a __mocks__ directory at the root of your project.
Within the __mocks__ directory, create a fileMock.js file, and a styleMock.js file, and add the following to them:
fileMock.js:
(module.exports = "test-file-stub")
styleMock.js:
module.exports = {};
According to the Next.JS documentation, some users might run into an error saying Failed to parse src "test-file-stub" on 'next/image'.
If you ever run into that error, you can simply just add a / to your fileMock, like so:
// __mocks__/fileMock.js

(module.exports = "/test-file-stub")
Add custom matchers to Jest
To add some additional functionality to our Jest setup, we can utilize @testing-library/jest-dom's custom matchers.
We'll create a file called jest.setup.js at the root of our project, and add the following to it:
// jest.setup.js

import '@testing-library/jest-dom/extend-expect'
Then, to add that import to every test, we can add an additional Jest configuration option in jest.config.js:
setupFilesAfterEnv: ['<rootDir>/jest.setup.js']
Now let's add a way of running our tests from the command line, by adding in the jest command inside our package.json:
"scripts": {
  "dev": "next dev",
  "build": "next build",
  "start": "next start",
  "test": "jest"
}
Now we can run our tests! But wait, we don't have any!
Let's write our first test together now.
Writing Our First Test
Create a __tests__ directory at the root of your project.
Within that directory, create a index.test.jsx file.
Add the following to the file:
import React from 'react'
import { render, screen } from '@testing-library/react'
import Home from '../pages/index'

describe('Home', () => {
  it('renders a heading', () => {
    render(<Home />)

    const heading = screen.getByRole('heading', {
      name: /welcome to next\.js!/i,
    })

    expect(heading).toBeInTheDocument()
  })
})
This is a simple test to render the home page of our website, and then check if the heading is present.
If the heading is there, the expect statement should return true and the test will pass.
Running our test
To run our test, head back to the command line and run npm run test, from the root of your project.
If you've set everything up correctly, your test should pass and look like this:
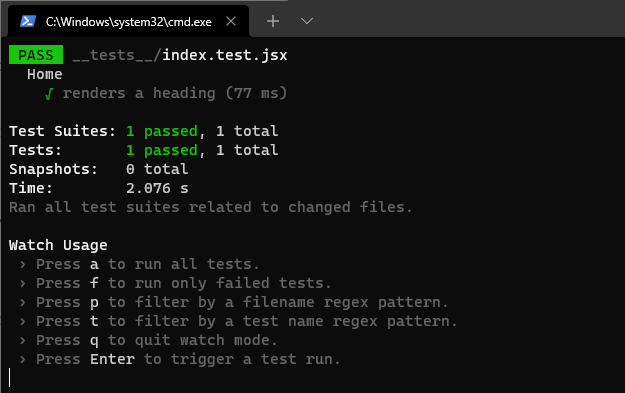
If it does, great work! You're now ready to test your Next.JS project using Jest and React Testing library.
If you're ready to add End-to-End tests, we'll set that up now too.
Adding End-to-End (E2E) And Integration Tests with Playwright
To add Playwright to our project, run
npm init playwright
This will initialize Playwright in our project, and give us a few options to kickstart our E2E testing.
Let's set up our Playwright like this, to begin with:
Initializing project in '.'
√ Do you want to use TypeScript or JavaScript? · TypeScript
√ Where to put your end-to-end tests? · e2e
√ Add a GitHub Actions workflow? (Y/n) · false
√ Add common examples which demonstrate Playwrights capabilities? (Y/n) · false
This will create an e2e directory at the root of your project, containing one example.spec.ts file which is a simple example Playwright test.
It also adds another script for us to run in package.json called test:e2e; let's go ahead and run that now from our command line
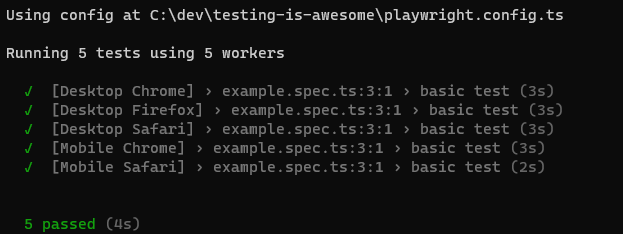
npm run test:e2e
If you've set everything up correctly, you should see the following:
One last thing to add is that we want to ignore Playwright's tests when we're running our npm run test command.
To do that, we need to add the following:
"<rootDir>/e2e/"
into our testPathIgnorePatterns array, inside our jest.config.js file. So it should now look like this:
  testPathIgnorePatterns: [
    "<rootDir>/node_modules/",
    "<rootDir>/.next/",
    "<rootDir>/e2e/",
  ],
Awesome!
Let's see how we can put this all together to make sure everything works before we push to production.
Building out a CI/CD Pipeline with GitHub Actions
GitHub Actions is a way of running scripts whenever you do something on GitHub.
Well, that's pretty vague... let's give a better example.
Typically within production pipelines, you want to make sure your code is valid before you push it to production. This gives you added confidence that what you're pushing out to users actually works!
We're going to use GitHub Actions to:
- Run our unit tests
- Run our E2E tests
in an isolated environment on every push and pull request to the main branch of our Git repository.
To create a Git repository, head to https://github.com/new
Follow the instructions provided on the page (once you create the repo) to push your existing code to your new GitHub repository.
Once you've pushed your existing code to GitHub, let's get to work on GitHub Actions.
Head back to your code editor and create a new directory called .github.
Within that directory, create another directory called workflows.
Within the workflows directory, create a file called tests.yml.
If you're not familiar with YAML files, they are very common for DevOps style work including CI/CD pipelines, and it stands for, Yet Another Markup Language. Seriously!
YAML files are really pleasant for readability and get a lot done in a very short amount of code. Let's populate our tests.yml file with the following:
name: Run All Tests
on:
  push:
    branches: [main, master]
  pull_request:
    branches: [main, master]
jobs:
  test:
    timeout-minutes: 60
    runs-on: ubuntu-latest
    steps:
      - uses: actions/checkout@v2
      - uses: actions/setup-node@v2
        with:
          node-version: "14.x"
      - name: Install dependencies
        run: npm ci
      - name: Install Playwright
        run: npx playwright install --with-deps
      - name: Run Jest
        run: npm run test
      - name: Run Playwright tests
        run: npm run test:e2e
Let's break down what we just did.
We're creating a workflow that has:
- Several triggers: This workflow will trigger whenever a push or a pull_request is made to two branches; main and master.
- One job called
testwhich contains many steps.
Hopefully, each step is self-explanatory as it is quite readable as I mentioned. But let's expand on why we're doing each step a little bit.
- We set up our environment to run on,
ubuntu-latest, which just means we run this on a machine that is running the latest version of the Ubuntu OS. - We use
actions/checkout@v2to allow this workflow togit checkoutour repository (AKA, allow this workflow to read our code). - We use
actions/setup-node@v2so that our workflow system can use Node JS; which is required to run our scripts.
Then we install Playwright, and kick off the scripts that we added earlier; npm run test and npm run test:e2e. Running our Jest/React Testing Library scripts and running our Playwright E2E scripts respectively.
If all of our scripts/tests pass successfully, this workflow will also pass successfully; ensuring that your code is safe to ship to production every time you push.
Conclusion
We've now successfully set up the tools and infrastructure required for a robust testing and CI/CD pipeline!
With
- Unit tests for JavaScript and React components using Jest & React Testing Library
- End-to-End Tests for our critical system flows.
- Automated Triggering of both of these tests occurring on each
pushandpull_requestto ourmainbranch!
Support Me
If you enjoyed this kind of article and would like to support more free content like this, please consider supporting my work with a Hashnode Sponsor!
Sponsor Me:
100% of the money will go to me, and in turn directly back into content like this.
While you're here, consider checking out my YouTube Channel and Twitter as well!
Youtube 👉https://www.youtube.com/c/JarrodWatts
Twitter 👉https://twitter.com/jarrodwattsdev
Thank you so much!