

How I Released A Next JS App to the Google Play Store (with AWS Amplify)
A Website I created for a Hackathon is now in Review for the Google Play Store.


For those who prefer to feed their craving for programming content via video, I've re-created this article on YouTube as well, check it out if you are interested!
(please excuse the clickbait...)
What Is The App?
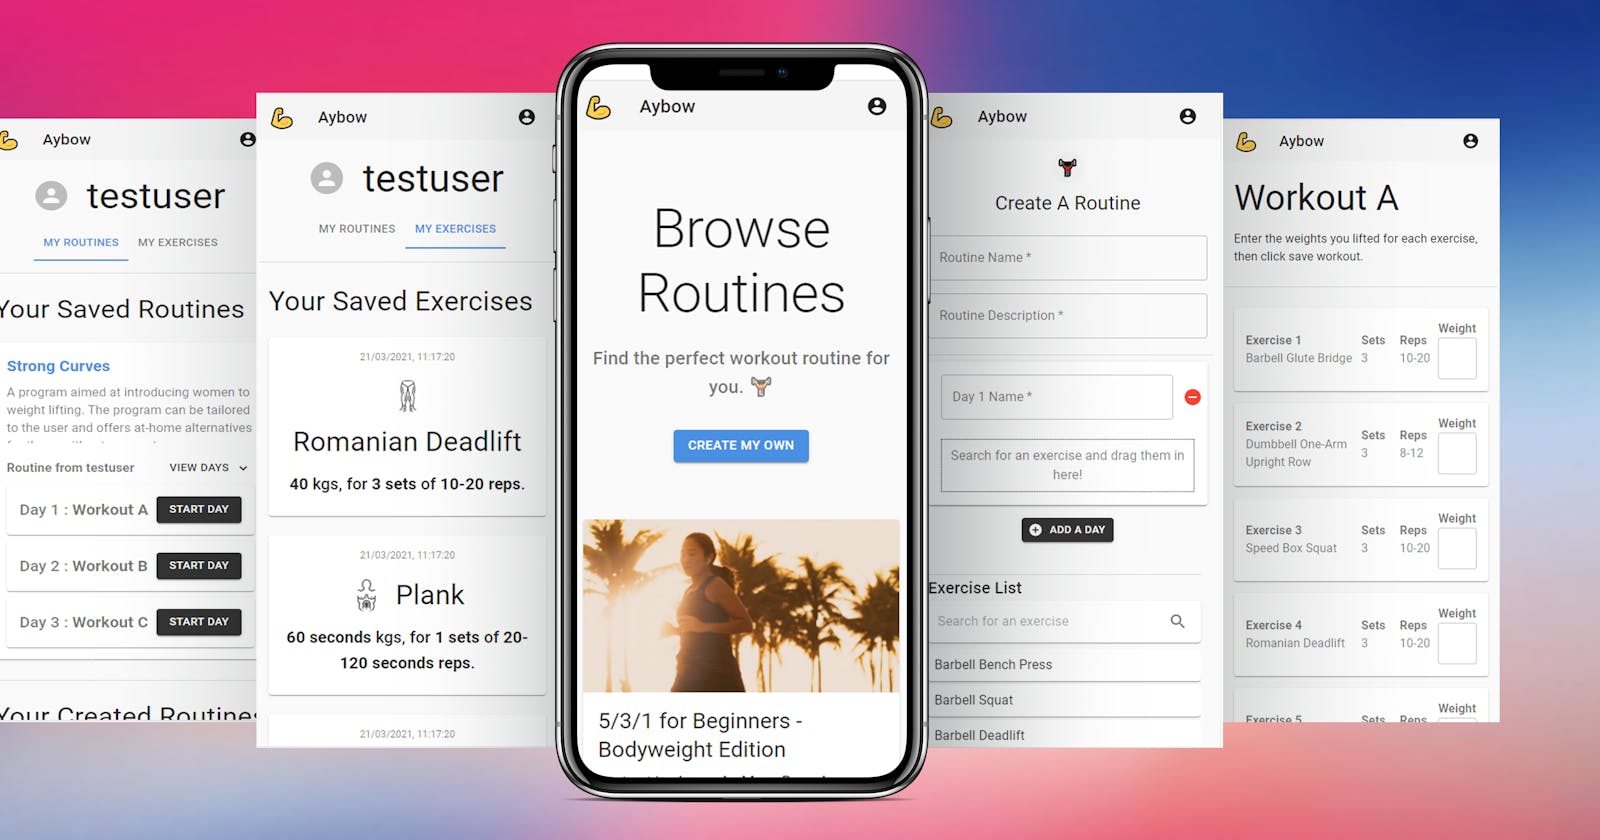
You can check out the website version of the app here: aybow.com
On February 9th this year, Hashnode and AWS Amplify announced they were hosting a Hackathon.
My submission was a fitness-based web application where you could create custom workout routines with a drag and drop user-interface.
You can find that article here (it's a very long read...)
Although I didn't place in the hackathon, I have continued working on the web application over the past month, and have made a lot of progress since:
- Added Social Sign Up & Sign In.
- Added "Start Day" functionality, to save the user's weight on each exercise.
- Redesigned the entire onboarding flow.
- Added Recommended Routines on the homepage.
- Made the web app a PWA (Progressive Web App) and a TWA (Trusted Web Activity.
- Submitted the app to the Google Play Store.
Fixed a tonne of bugs! 🐞
What Is The Tech Stack?
The Backend
AWS Amplify
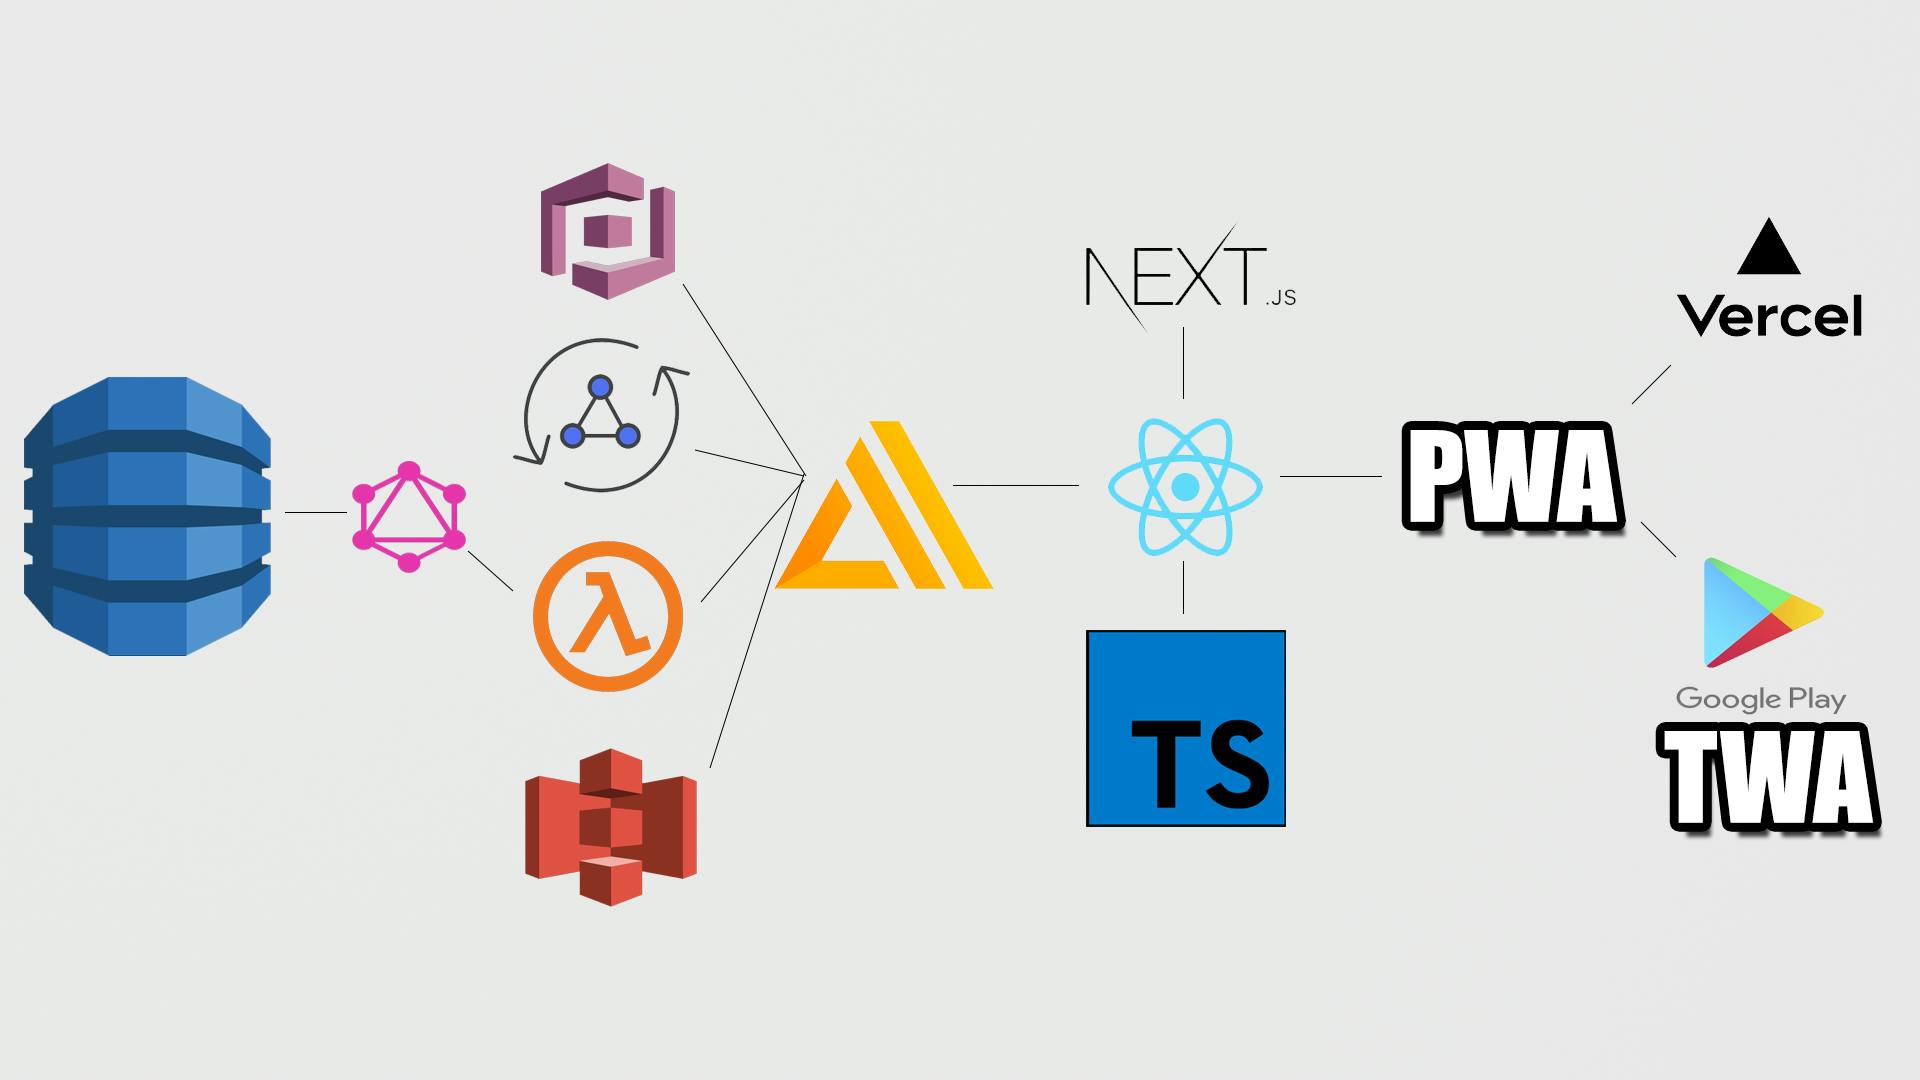
AWS Amplify is managing our entire back-end serverlessly (that is totally a word). It is orchestrating everything. From the image storage, to the user authentication, to the raw data. Here's exactly what it's managing:
DynamoDB: In my DynamoDB, I've got three main tables:
- Users Table (Rows are created via a Lambda Function on a Sign Up Trigger)
- Saved Weights Table (Where exercises are stored when users save their weights after working out)
- Routines Table (Where all of the recommended and user-made workout routines are stored)
GraphQL & AppSync: I'm using AWS AppSync as a way of querying and mutating all of the data sources that I have stored in DynamoDB. AWS Amplify auto-generates all of the possible things I could ever need to do on my GraphQL API, as well as types for each of the queries, mutations, and subscriptions that it generates.
AWS Cognito: I'm using Cognito for the Authentication and Authorization of my application. Every time someone signs up to the site, either with email and password or with social media, (Facebook & Google) they have an account and a row in the database created for them using AWS Lambda.
S3: AWS S3 is where I'm storing my images for the routines.
The Front End
Next JS, React, Typescript
The dream team!
React works amazingly well with AWS Amplify, and all of the support that Next JS provides on top of React (server-side rendering, the pages folder 🤣) are incredible.
I only recently adopted Typescript into my "go-to" frameworks when it comes to web development, but I don't think there is any turning back now, if you haven't given it a try yet I would 100% recommend doing so!
TypeScript has provided me so much more confidence when deploying my app to the public that there aren't any pesky bugs that could happen, plus the autofill alone when working with objects is enough to get me on board!
How I made it into an App
Converting the website into an application was a two-step process.
- Converting the web-app to a PWA (Progressive Web App).
- Creating a TWA (Trusted Web Activity) from the PWA.
PWAs are web apps that use emerging web browser APIs and features along with traditional native app-like features, such as offline support.
TWAs are a new way to open web-app content, such as a PWA from an Android app, using protocol based on Custom Tabs.
To create a PWA out of your Next JS website, I first took a look at the example that Vercel has on their GitHub examples:
Taking note of the added PWA features, such as:
next.config.jsfilemanifest.jsonfile/public/iconsfolder- the
<meta>tags in_app.js
And copying them all over to my codebase.
Under the hood, the example linked above is using next-pwa, which is a library specifically made for creating PWAs out of Next JS websites; that can be found here:
Next-PWA under the hood of the hood is using Workbox; A a set of libraries made by Google, that help build the service worker(s) required for a Progressive Web App to be production ready.
To make sure my website was really a PWA, I used the Lighthouse tool in Google Chrome Dev Tools. Anything that wasn't approved by the Lighthouse Audit, I fixed until my website was PWA approved.

But alas, in order to submit an application to the Google Play Store, you need to have an APK, which a PWA still doesn't have.
There are a few videos out there about how to set up APK's manually using Android Studio, but I stumbled across a GitHub repository called Bubblewrap, made by the Google Chrome team.
I used the Bubblewrap CLI and followed along with this guide to convert my PWA to a Trusted Web Activity.
One small update from that video above if you are following along: You need to generate your assetlinks.json using the bublewrap fingerprint generateAssetLinks [Your SHA256 fingerprint from the Google Play Store here]
That was it! Bubblewrap CLI created a signed APK that I could upload along with all of my assets to list my app on the Google Play Store.
Conclusion
My App "Aybow Fitness" is currently in review for the Google Play Store, once it goes live, you'll be able to view it via this link.
Thanks for reading!